Showing posts with label Livestock. Show all posts

Thursday, August 7, 2014

"Cheeper" by the Dozen - Part 2

This is Part 2 in a series of three article about my experiences using foster hens to mother chicks that I got at a local farm store.  

In part one of the series, I shared the trials and tribulations of trying to use two foster hens to adopt and raise 12 chicks from a hatchery.

You can read Part 1 here:


Cheeper By the Dozen - Part 1


Part Two - Tragedy Strikes

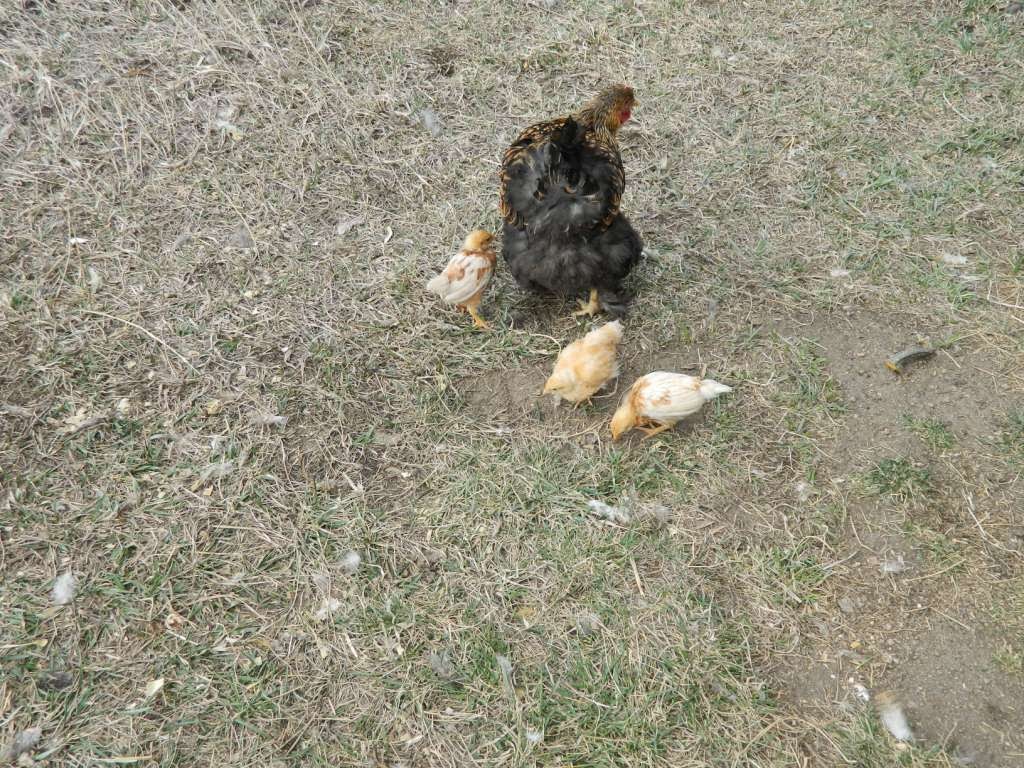
It's been a rough week for Team Omelette!  All of the foster chicks have died.  Heartbreaking!  

Hindsight showed me that my flock was becoming sick right before I brought the chicks in. Egg production had fallen off and their pooh was very watery.  I'd blamed those two things on molting and on a change in their diet because they were free-ranging more and eating a lot of grass.

That was not the case. They developed some kind of respiratory sickness. Right after I introduced the new chicks, I noticed that one adult bird was making a cough/sneeze sound. It was a wet, mucous-y sound. I made a mental note to keep an eye on her. But by the end of that day, six adults were sneezing. By the next morning, all of the adults were doing it.  The adult birds were still eating and drinking and moving around. There was no nasal or eye discharge.

The vet and I do not think the chicks were the source of the germs, since 1) the symptoms in the adult birds started before the chicks arrived and 2) the chicks were the last to get sick.


CAUTION! What follows here are the details of my experiences and the advice of a vet with respects to my flock and their unique symptoms. This is not a substitute for advice from your own vet.  DO NOT read this and go on to medicate your ill birds on your own. Call your vet and follow their advice.


My usual vet doesn't treat birds, so she referred me to another who is familiar with avian concerns. He recommended immediate treatment with antibiotics. Luckily, the antibiotics are available at most farm supply stores.

The difficulty is in the dosage amounts. This bag of tetracycline is measured to add to 100 gallons of water that large animals such as cows would drink.  It takes a tiny fraction of it to add to a few gallons of water for my flock.

I used my kitchen scale to weigh out the 7.62 grams of tetracycline needed to treat one gallon of drinking water for the adult birds. Since my scale doesn't measure in fractions of grams, I measured out 7 grams in one container and 8 grams in another. Combined, it averages out to roughly 7.62 grams for two different one gallon water containers.  

And the 4 grams for treating one gallon of water for treating the chicks. 

The medicine had to be mixed fresh each and every day.

Whatever this germ was, it hit the chicks hard. All of them died within about 36 hours. They would be acting normal and healthy and within a few hours would sicken and die. Even with the antibiotics. It was awful.

Four days after I started the course of antibiotics, the Team was starting to show improvements. All of the adult birds were getting better. The sneezing was subsiding.  I continued the antibiotics for ten full days to be certain all of the germs were gone.

For me, the decision to use antibiotics on my flock was easy even though I make every effort to use homeopathic means to treat illness. I felt that the situation was critical enough that I would lose the entire flock if I didn't use the tetracycline.

It was awful to lose all the babies like that. I spent a few days second guessing my actions and choices. Should I have isolated the babies and not tried to use foster hens? Should I have isolated the hens and babies from the rest of the flock? There are no clear-cut answers. I used foster hens to raise chicks in with the flock before with no trouble at all. 

I learned some important lessons though and won't write-off signs and symptoms of illness as something benign anymore. I sure don't want to go through another ordeal like this one!

In Part 3 of this series of articles, I'll detail the aftermath of the illness and what steps I took to clean and disinfect the coop.


Sunday, August 3, 2014

"Cheeper" by the Dozen - Part 1

While this article began as a stand-alone one on the topic of using broody hens to foster chicks, necessity dictated it end up as a three part article. 


Part 1 - Attila the Hen and Joan Jett

Here they are! The second batch of baby chicks. 

This batch of babies (all pullets), the Dirty Dozen, included four Welsummers, 4 Ameracunas and 4 Cuckoo Marans.  


If you are counting, you'll only see ten babies in the photo. That's because two of them were already with their foster hen mother.

Earlier this year, I successfully used one of my Cochin hens to foster three Buff Orpington chicks. You can read about that project here: Operation Chicken Little

High off of that success, I figured it would be a cinch to use other broody hens to foster this new batch of twelve.

Wrong!!

If you are planning to try the foster hen program, there a couple of things that seem to be essential for success. First, the obvious one which is a broody hen. You'll know you have a good broody when she's been sitting tight on a nest for at least a week. You can let her sit on some eggs or use fake eggs or even golf balls. Anything that resembles eggs is fine. And second, at least for the first couple of weeks, you need to isolate the broody hen and the foster chicks from the rest of the flock. This protects the hen from interference from the flock and prevents the babies from wandering away from momma. Unconfined chicks can stray away from their mother and be unable to find their way back. They'll get chilled and die or else be at risk of attack from the rest of the flock.

The isolation pen doesn't have to be fancy. I fashioned one from a scrap of chicken wire, a grill from an old oven and a piece of plywood. For this round of fostering, I used cardboard from a medium-sized box to partition off part of the coop floor where my Silkie Bantam had built a nest for herself.

Some other ideas are rabbit pens or dog crates. It simply needs to be large enough to hold the hen and babies plus food and water containers. And it needs to be secure so the chicks can't get out. 

But meanwhile, back at the ranch, I will share with you the semi-disastrous experiences I had this time around.

The day before I got the chicks, I had three broody hens; a Silkie Bantam, a Cochin and a Buff Orpington. All three of those breeds are well-known for their mothering skills and willingness to foster chicks.  Yay! Of course when I have a dozen peeps in a box waiting for their foster moms, the Buff Orpington goes off the nest.  That left me with two hens.

The Silkie Bantam, whom I have named Joan Jett because of her hairdo, had made a nest for herself in a dark corner of the coop. 

In the middle of the night I slipped two of the chicks under her. No problems at all. In the morning, Joan was mothering the chicks and the chicks were happy and doing little chicken things like scratching for food.  Success!

You can see one little peep butt at about 6 o'clock under Joan Jett. 
  
Since Joan Jett did so well with the first two, I wondered what would happen if I gave her two more. I did not wait for night time. While the first two were out from under her and eating, I put two more chicks in the isolation pen with them. Chickens are smart, but they can't count. And Joan Jett gathered the two new ones under her just as gently as could be.  

I know that it all sounds hunky-dory but you haven't met Attila the Hen yet. 

Attila the Hen is the name I've given to the broody Cochin that is also a part of this round of foster mothering. She is a force to be reckoned with!

Attila was sitting tight in a nest box and needed moved into isolation.  In the middle of the night I picked her up and put her in isolation. She pecked me hard a few times in the process. Come morning, she was frantically trying to get out of the pen, so I let her out and she went back to the nest box. The next night was the same.  She pecked when I picked her up to move her and in the morning, she was trying to get out of the pen.  Attila did NOT want to be in that isolation pen. So much for that tactic.

Here I was with eight chicks needing a foster mother and Attila the Hen who was resisting my efforts to make it happen. 

In the event the fostering fell through, I have the heat lamps and such to raise the babies on my own. But the ideal situation is for a hen to do the work. She teaches the babies how to be chickens plus the babies are naturally integrated into the flock pecking order.

As a last ditch effort, I decided to leave Attila in her nest box and just slip the chicks in with her. I set my alarm for 4:00 AM for Operation Peep Sneak said a few prayers! This is when Attila the Hen got her name. 

She pecked ferociously at me when I tried to put the chicks in with her. I used a piece of cardboard to block her because she was blindly attacking anything that moved near her, including the chicks!  But once the chicks got underneath Attila, she settled down. And I settled in to monitor the situation. I sat on an upside-down bucket in the coop in the dark and listened for any signs of peep distress. 

Come daylight, everything seemed to be OK. Attila was sitting quietly in the nest box with the chicks. Anytime another hen would approach, she would make angry clucking noises and try to peck the intruder. 

I took a break to feed some breakfast to the horses, myself and my husband. When I went back to the coop, things had fallen apart.  Attila had moved to another nest box and that spelled trouble. Inside the nest box she'd left were two dead chicks. I don't know if Attila killed them deliberately or accidentally. But it was so sad!  Two live chicks were left behind in the old nest box, two managed to follow Attila to the new nest and two were missing. 

This is why figuring out a way to isolate the broody hen prior to introducing the foster chicks is so important!  If she's confined, she can't move someplace where the chicks are unable to follow. 

I picked up the two chicks who'd been left behind and put them in with Attila. She got me a few times in the process but didn't go after the chicks. I used a scrap of cardboard to close off the nest box so Attila and the chicks would stay put.  Then I went searching for the missing two. One had made it all the way outside into the run and was huddled in a corner, peeping pathetically. The other was still inside the coop, wedged in a corner and looking very miserable.

I brought those two up to the house and put them under a heat lamp. To help their little bodies recover, I gave them these electrolytes in some water. 

But it was just too much for their tiny bodies. Within 12 hours, both had died. 

I had made several errors and now four chicks were dead. First, Attila wasn't isolated before introducing the chicks. And second, when I first put the chicks in the nest box with her, I should have blocked off the entrance to the nest box so she couldn't leave and the chicks couldn't accidentally get out.

Attila seemed to be OK now, though. She was fluffed up and would cluck softly to the four chicks who were nestled in her feathers. But boy howdy she'd turn vicious in an instant if another hen came near or if I tried to see if the chicks were OK.  

The next day, I successfully moved Attila and the four chicks to the isolation pen. (while wearing heavy gloves and a long sleeve shirt as protection from her sharp beak!) She was completely bonded to the chicks and them to her.  Even in the isolation pen, Attila is living up to her name. She perceives any hen in the vicinity as a threat to her babies. 


Although you can't see them, there are four chicks under Attila!


Joan Jett and her four chicks were also doing well. She's a devoted little momma!

This morning, all eight surviving chicks are doing fine. It's fun to watch the little puff balls come out from under their Momma's feathers to get some food or a drink. 

At one point, I watched Attila move to another part of the isolation pen. The four chicks were under her when she did. She was all fluffed up and twice her normal size to cover the babies and moved in kind of a crouch across the pen. Little chick feet scrambled under her to keep up. Wish I'd had some video of that!

If you have been reading this as part of your efforts to learn how to use a broody hen as a foster mother for chicks, please don't be discouraged by the troubles I had. Learn from the mistakes I made.

Isolate your broody hen a few days before introducing the chicks. And make sure hen and chicks can't be accidentally separated. 

Please feel free to ask any questions or voice any concerns you might have regarding foster hens. I would be happy to give you suggestions or advice on your unique situation!

In Part 2 in the Cheeper by the Dozen series, things go awfully, horribly wrong.


Here is a link to Part 2:


Cheeper by the Dozen - Part 2


Monday, July 14, 2014

Living with Pigs - Update on Month #2!

Living with Pigs!

My friend and fellow homesteader Barb is back with an update on the two pigs she and her husband are raising. 

I've got to admit that I'm jealous, since I'd love to raise pigs but don't have the set up to do so!

And while you're reading, take a closer look at the water system they're using. Ingenious!

Without further ado, here's Barb with her update:


We have had our cute little pigs for over 1 month now and I must say they are not cute little pigs anymore.  I cannot believe how much they have grown in the last month.  It is a good thing humans don’t grow like that.

We have named them Priscilla and Hamlet even though I know we will be sending them to slaughter.
Hamlet is much bigger than Priscilla as he tries to hog all the food, no pun intended. They love the mud puddle I have created in their pen.  


I am still putting sunscreen on their ears only now, I have realized that pigs do like to sleep late like teenagers.  I go down every morning at 5AM and they are sleeping and don’t care that I am slobbering sunscreen on their ears.

I asked my husband one night if he knew if pigs swam as I was nervous about letting them out of their pen because of our pond.  He said he didn’t know but then a friend sent me a video of a pig saving a goat in the water.  Priscilla and Hamlet had their first outing on Sunday to our pond; oh they loved the mud in the pond.  


Oh what fun they had they looked like little statues with mud all over them

We rearranged their stall so they would have more room; we moved their water tank to the side so they can get in and out of their door to the outside easier since they are getting so big.  

We bought them a bigger feeder since they kept emptying their smaller one.  


Now at work I don’t have to worry if they run out of food.  They like to knock over their outside water buckets but I don’t have to worry about them not having anything to drink as they have their 55 gallon drum inside with their nipple on it.

All in all they are fun to have they grunt as soon as they hear me coming down at night and  they start squealing like crazy as they know I have people food for them .  I never knew that pigs squeal like that out of excitement.  People at work bring me their scraps too, to feed the pigs.

Their pen is right next to my garden. They love talking to me while I am weeding the garden as they know they are going to be thrown all the weeds.

Well that is living with pigs month 2.

I will update next month on their progress.

Tuesday, April 22, 2014

Sprouts


The baby peeps are huge!  


And cute!  


But, meanwhile back at the ranch...

My experiment with sprouting sunflower seeds for the Team was mostly a success. The seeds sprouted nicely.  


But as far as the Team is concerned, the jury is still out on how yummy the sprouts are. They love sunflower seeds but are now disconcerted by the things growing out of them. They try to separate sprout from seed and only eat the seed part. Hopefully, they'll get it figured out. 

(UPDATE: they eventually ate all of the sprouts. So I guess they decided it tasted "yummy".


Sprouting is a very efficient way to grow food for the Team. One pound of sunflower seeds yields two to three pounds of sprouts in about a week. Not a bad return!

I use this old tub that used to have a mineral supplement for the horses as my sprouting container.  

Soak the seeds overnight, then drain off the water.  

Cover the wet seeds with something...newspaper or a lid. Then check it every few days to see if it's looking dry. If so, add enough water to keep the seeds moist but not so much water that the seeds are floating.

When the sprouts are about an inch long you can feed them to the chickens. 

Or, you can uncover them and put them in a sunny place for another few days. This will allow the sprouts to grow bigger and get green. 

If temperatures are chilly, the seeds take a lot longer to sprout. Be patient! 

One note of caution, I have heard that some sunflower seed has been treated with something that prevents sprouting. I think that's the variety used in bird feeders. Just to be certain, read the bag before you buy any that you intend to sprout.

Have you tried sprouting seeds to feed to your flock? What seeds? How did it turn out?


Sunday, March 30, 2014

Deep Doo-doo

I know you all are curious about how the babies are doing with their foster Momma. They're are about a month old now and growing fast.

Aren't they cute?


Momma has been given a real name by the daughter of a colleague of mine.  "I" named her Lola, which I think is an adorable and fitting name for her. Much better than the boring "Momma" I've been calling her!


Lola has started taking her brood outside to free-range for short periods of time.  The babies are growing up!


For the first time they have been mingling with the rest of the flock. I was afraid for them, since there's always the risk they'd be pecked to death by another chicken.  

Happily, the flock pretty much ignored the babies. I only saw a baby get pecked one time. She was at the food when another hen came over to eat. The baby didn't move out of the way of the hen, so she got a peck on the back. That sent her running back to Lola, who seemed to say, "What did you expect when you don't yield to someone higher on the pecking order?"

Like all youngsters, they are learning their place in society and how to fit in.  

DEEP LITTER

I've been using a technique called the "Deep Litter" (DL) method inside the chicken coop. Instead of cleaning out the bedding in the coop weekly or monthly, you just add more new litter on top of the old. The layers build up and compost right there on the coop floor.  Coop cleaning happens only once or twice a year. 

But doesn't it stink?  Nope. Not if you're doing it right. If there is an ammonia smell, you don't have enough litter on the floor!

I use pine shavings on the coop floor. I started with about a 3" thick layer when I put Team Omelette in the coop back in July. My coop has a dirt floor, which is ideal for the DL method. But you can use DL with any type of coop floor.  

All I do is add another couple of inches of fresh pine shavings every couple of weeks, or when it starts to look dirty in the coop. The fresh layer is added on top of the existing shavings.

An important part of the DL method is stirring up the bedding so the wet droppings can dry out.  I'll rake it around myself sometimes, but it's easier to let the chickens do the work. Once a week, I'll throw some grain down on the floor. The Team busily scratches around to find the grain and in the process rakes the bedding for me.  Cool huh?

If you start to notice an ammonia smell, your bedding is too wet.  Throw some more bedding down, then rake it in to help dry things out. 

Since I started the DL process in the summer, by the time winter set in there was a thick layer of litter on the coop floor. The composting action generates a small amount of heat, which keeps the inside of the coop five to ten degrees warmer than the outside air temp. Believe me, in the middle of a Colorado winter, those few additional degrees make a difference!

Now that it's time to get the garden ready for spring planting, it's also time to clean out the coop. 

You can see how broken down and composted it all is.

Be sure to leave a thin layer of the old stuff so that the helpful microbes in it can get to work on all the new bedding and pooh that's about to be deposited.

I have a new ranch hand, "M", who came over to help me with this coop cleaning. We took four of these carts full of composted bedding out of the coop.


You can put all that old bedding into your compost pile. I'm simply digging it into the garden beds. It's mostly composted anyway.

There's still a small risk that the high nitrogen in the uncomposted, fresher pooh will burn the seedlings.  It's a risk I'm comfortable with.  There's not that much of it and it'll sit there for a few weeks to a month or so before anything is planted. I think it'll mellow out in that time and not burn the seedlings.

Now put down a nice layer of fresh bedding on the coop floor and start the DL process all over again.

Team Omelette loves it when there's a fresh layer of shavings in the coop. They busily scratch through to see if there's anything edible in it.

I'll let this build up through spring and summer then clean it out again in the fall. It doesn't get much easier than this!  No more cleaning the coop every week.  Using the DL method is really just composting inside your coop.  

Along with my nifty feed and water systems, the DL method really cuts down on the amount of work it takes to keep a flock of chickens.  Work smart, not hard!

Oh, if you decide the DL method is right for your flock, do not use diatomaceous earth or any pesticides in the coop. It'll kill off all of the helpful microbes and organisms that are working to compost the litter!

Good luck and let me know how it works for you.

There's no real reason for posting this photo of Kipp taking a siesta other than I think he's an awesome horse and riding partner!


Sunday, March 23, 2014

Chicks (with Sticks)!

Part 1: Chicks

First, an update on Operation Chicken Little.  It's an outstanding success!  

The babies are very active and wanting to explore everything. 


This afternoon, G.W. and I were in the coop refilling the feed hoppers. I needed the help because I threw my S1 joint out and I'm more or less an invalid right now. G.W. is an effective, but stern nurse!

Any-who, Momma Hen was pacing inside the isolation pen and acting very agitated. I thought maybe it was time to let her and the babies out to mingle with the flock. Since most of the flock was outside free-ranging, it was a good opportunity to see what Momma would do.

I opened up the little pen and Momma came right out. Alone. The babies stayed in.  Momma stretched her legs, scratched around a bit, pooped, then went back into the pen with her babies.  Interesting. All she seemed to want was a minute or two to herself. <All the human Moms are nodding in agreement right now>

One of the babies climbed up on their water jar to see where Momma went.

 "All I want is some time away from those kids!"


I have another eight chicks on order for the first week in May.  Say a prayer that I have another broody hen who is ready, willing and able to foster them!  


Part 2: Chick with sticks


During the winter, I switch from my outdoor hobbies like gardening to indoor hobbies. I call them "chair hobbies" since they're things I do while sitting in a chair. (Usually while watching a movie) This winter I decided to learn how to knit. 

I've been a crocheter since I was about 10 or 12 years old. I taught myself using a book from the 1940's that I inherited from my Great Aunt Margaret. But knitting always intimidated me a little. I think it was the idea of using two knitting needles. Some years ago, I learned how to do the basic knit and purl stitches but never took it any further.

This book, Fearless Knitting Workbook by Jennifer E. Seiffert, has been my guide.  It's a wonderful tutorial where you make 8" x 8" practice squares with each lesson. 


Within just a few weeks I'd completed these squares while learning to increase, decrease, read patterns and charts and use various cable techniques. I think I'm going to piece some of the squares together for pillow covers.


There are many other lessons in the Fearless Knitting Workbook that I haven't done yet. The ones on lace knitting look interesting!


Next up was a scarf for G.W. in the colors of his favorite football team, the Denver Broncos. It was just a simple ribbed pattern but gave me tons of practice with knit and purl stitches.


Piper likes to help me knit. She says, "If I only had disposable thumbs, I'd knit, too".  I think she means "opposable" thumbs! But that doesn't stop her from playing hard with the yarn and knitting needles.


This is my first project knitting in the round. It's a stocking cap for G.W. made with Lion Brand Fisherman's Wool yarn. 


I found the pattern for it on a blog called Hats for Israeli Soldiers. It's the pattern people use to make and donate wool caps for soldiers in the IDF (Israel Defense Forces).

The pattern is available in both English and Hebrew.  Neat, huh?

G.W. teases me now with the nickname "Knit Wit".  That came about because he asked me a question while I was counting knitting stitches and I answered him with louder counting.  If you knit/crochet, you will understand that completely!

Now I'm trying a new knitting technique called Magic Loop. Come back next week for details on what it is, why people use it and how I'm coming along with learning it. (Hint: right now, it's not pretty. Not pretty at all!)


Also next week, using the "deep litter method" in the chicken coop.