The ingredients are readily found at craft stores and in your own pantry. Here's the cast of characters:
Store-bought soap in both the suspension formula:
(Suspension formula keeps added ingredients suspended throughout the bar of soap instead of letting the ingredients settle to the bottom. I chose a goat milk based soap.)
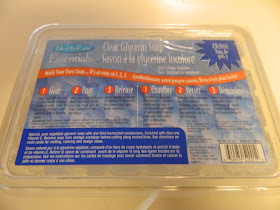
...and in the regular, clear glycerin formula. Both are available at craft stores.
I'm 'flavoring' this batch of soap with oatmeal, brown sugar, vanilla and cinnamon. Yes, that's instant oatmeal! The vanilla is an essential oil that I picked up at the craft store.
You can easily create your own custom blended flavor. I thought honey and ginger would be nice. Or lavender vanilla. I love the scent of patchouli, which is available as an essential oil. You're only limited by your imagination!
The craft stores sell molds for making soap. As I was standing in Michael's craft store with the $5 round soap mold in my hand, I suddenly recognized the shape. The bottom of yogurt cups! The molds looked almost the same as the bottom of the cups of Greek yogurt I love to eat!
Instead of spending the $5 on the mold, I saved the cups from my daily yogurt (washed out, of course!).
Making the soap couldn't be easier! Cut the brick of soap base into squares and drop them into a microwave-safe container. I started with the goat milk suspension soap base for my first layer.
After about a minute and a half in the microwave, the soap was melted.
Now is the time to add your custom ingredients. I stirred in some of the brown sugar oatmeal and about a dozen drops of the vanilla essential oil, then poured the liquid into the yogurt cups. Using the suspension formula soap base keeps the oatmeal from settling to the bottom.
I filled the yogurt cups about 3/4 of an inch deep for this layer.
This first layer needs to cool and harden before I pour in the second layer. It only takes about 30 minutes to cool.
For the second layer of soap, I melted the regular, clear glycerin soap base and flavored it with a little cinnamon and some of the vanilla essential oil.
There are air bubbles in the liquid soap and they rise to the surface.
The soaps look prettier if there aren't any air bubbles. I did a little internet research and found that a spray bottle with rubbing alcohol is all you need.
Spritz the surface of the liquid soap with a little rubbing alcohol and the bubbles (almost all) disappear.
My internet research on air bubbles in soap also taught me that soap layers will stick together better if you spritz the first layer with a little of the rubbing alcohol before adding the next layer.
Here are my yogurt cups with the soaps.
I let them cool for a few hours, then popped the soaps out.
I might be biased, but I think they look pretty and not at all like homemade soaps from yogurt cups!
In this photo, you can see both layers clearly.
I test drove the soap myself and I love it! Lovely scent and beautiful lather. It didn't dry out my sensitive skin, either.
Isn't this amazingly easy? Try it yourself and see! If you do, please let me know how it goes and what flavorings you choose.


No comments:
Post a Comment